DIY Beaded Jewelry: A Beginner’s Step-by-Step Guide
Imagine slipping on a necklace you made yourself, one that catches the light just right and turns heads. Beaded jewelry has that magic, it’s been around for ages, from ancient tribes to modern runways, yet it’s simple enough for anyone to start today. You don’t need fancy skills or a big budget to create something beautiful.
Crafting beads can calm your mind, like a quiet walk in the park after a long day. It lets you unwind while making pieces that match your mood, whether you go for bold boho vibes or clean, simple lines. Plus, it’s cheap, basic supplies cost less than a coffee run, turning your spare time into wearable art.
In this guide, we’ll walk you through how to make beaded jewelry from scratch. You’ll learn the tools you need, easy designs to try, and step-by-step tips to avoid headaches. By the end, you’ll feel ready to string your first bracelet or necklace with confidence.
Essential Tools and Materials for DIY Beaded Jewelry Making
Starting with the right gear makes DIY beaded jewelry smooth and fun. Beginners often grab cheap kits from craft stores, but focus on sturdy basics that last. Look for sales at places like Amazon to keep costs under $50, that’s enough for several projects without breaking the bank.
Quality matters for pieces that won’t fall apart after one wear. Skip flimsy tools that bend easily; instead, pick ones with good grips. This way, you build habits that lead to pro-level results fast.
Check reviews to find deals on bundles that include beads and wire. Starting small keeps things exciting, not overwhelming.
Selecting the Right Beads for DIY Beaded jewelry
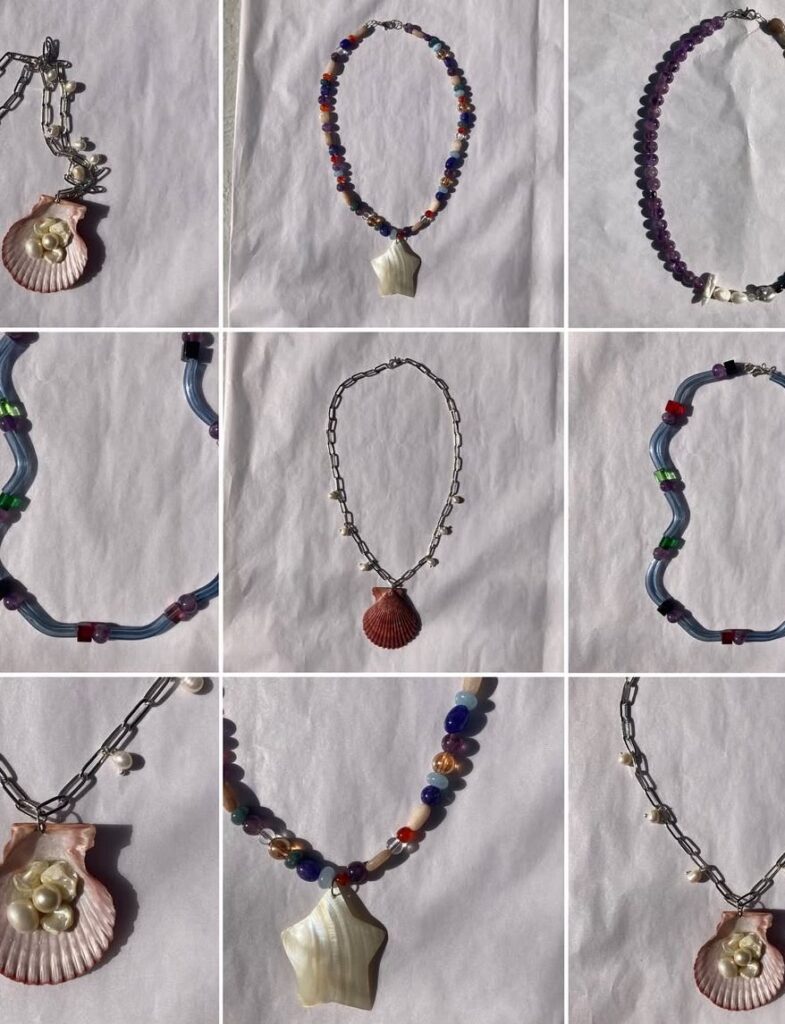
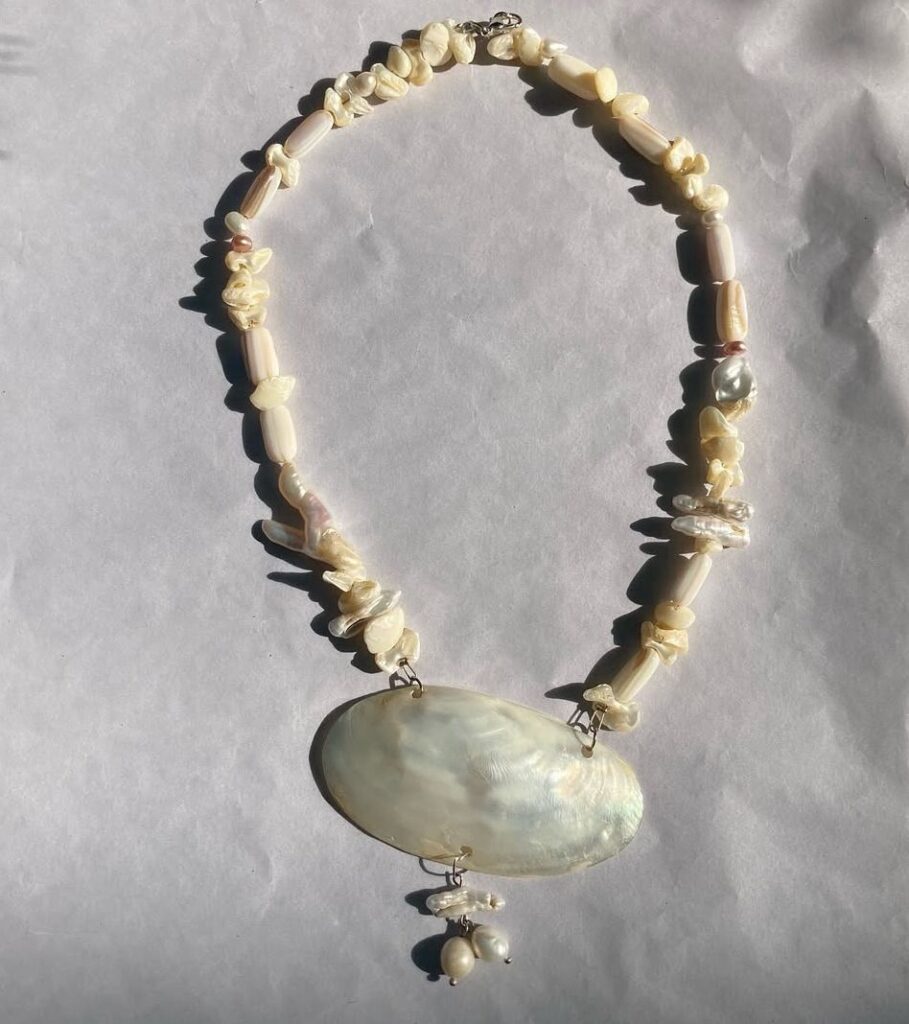
Beads come in all sorts, each adding its own spark to your designs. Glass beads shine bright and cost little, while crystals catch rainbows for fancy looks. Wood ones feel warm and rustic; gemstones like quartz bring a touch of luxury without huge prices.
Sizes range from tiny 4mm seeds for delicate work to chunky 12mm rounds for bold statements. Pick shapes like rounds for easy flow or ovals for a soft edge; test a few on a string to see what fits your idea. For colors, grab a wheel from a dollar store and match blues with oranges for pop, or stick to soft pastels for calm.
Mix sizes in one piece, like small spacers between big focal beads. This adds interest without chaos. Always buy a bit more than you think, beads roll away quickly if you’re not careful.
Tools You’ll Need
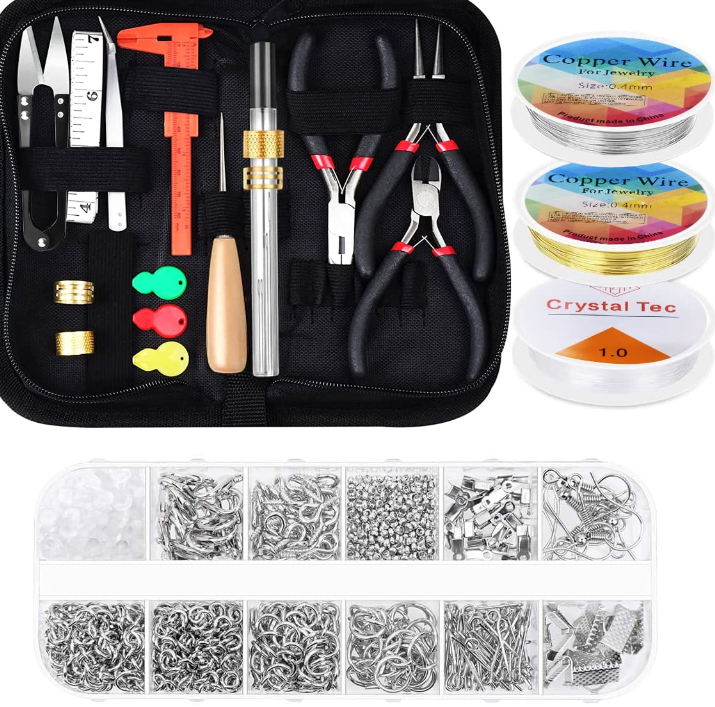
A few key tools turn Beads into craft. Beaded Jewelry needles slide through tight holes; get flexible ones for nylon threads. Wire cutters snip clean ends on metal wire, saving your fingers from frayed bits.
Pliers are must-haves: round-nose for loops, chain-nose for gripping tiny parts. Ergonomic handles with soft padding cut down on aches during long sessions, think of them as your crafting gloves. A bead board keeps everything in place, like a puzzle mat for your patterns.
Don’t forget measuring tape for even lengths. Store tools in a roll-up pouch to stay organized. These picks make how to make beaded jewelry feel less like work and more like play.
Basic Supplies and Where to Buy Them
Stringing materials hold it all together, nylon thread for stretchy bracelets, elastic cord for quick ties, or stiff wire for structured necklaces. Findings like clasps keep things secure; earring hooks turn beads into instant studs. opt for nickel-free options if skin sensitivity runs in your family.
Local hobby shops let you touch and match colors on the spot. For variety,
unique beads from around the world, search “bulk seed beads” for deals under $10 a bag. Bulk buys save cash; a 1000-piece lot covers months of projects.
Amazon Prime speeds things up with next-day delivery. Start with a $20 kit that has thread, clasps, and mixed beads. This setup lets you jump into DIY beaded jewelry right away.
Choosing Designs and Planning Your First Project
Great designs start with what sparks joy in you. Flip through magazines or scroll Instagram for DIY Beaded jewelry trends like layered chains or earthy tones. Keep it simple at first, master one technique before tackling wild ideas.
Planning saves time and beads. Sketch on paper or use a phone app to map colors. This step turns vague thoughts into real plans you can touch.
Finding Inspiration for Beaded Designs
Nature offers endless ideas: think river stones for smooth pebble bracelets or fall leaves for warm hues. Fashion icons like boho celebs wear simple strands that you can copy with basic supplies. Personal style shines through, pair your favorite outfit colors for pieces that feel like you.
Pinterest boards overflow with free patterns; search “easy DIY beaded necklace ideas” for quick wins. Jewelry blogs share free tutorials with photos. Adapt a red-carpet look by swapping gems for affordable glass, same vibe, less spend.
Watch how light plays on beads in store windows. Jot notes on what draws your eye. This habit fuels fresh takes on how to make beaded jewelry every time.
Simple Beginner Projects to Start With
Single-strand bracelets teach tension control fast. Grab an elastic cord, add 20-30 beads in a pattern like big-small-big, then knot tight. It takes under 30 minutes and wears comfy all day.
Hoop earrings build loop skills. Thread beads on wire, bend ends with pliers, and hook on. Use lightweight glass for swing without pull, perfect for daily wear.
These projects use few tools and show quick results. They cover crimping and spacing basics. Try one this weekend; you’ll surprise yourself.
Planning Your Bead Layout
A bead board acts like a design runway, lay out patterns without committing. Sort by color in trays for easy swaps. Aim for balance: even spacing on both sides for symmetry, or cluster one end for fun asymmetry.
Build a mood board with fabric swatches or photos of outfits. This visual check catches clashes before stringing. Test the layout by sliding beads; adjust for flow.
Keep notes on what works. Over time, your plans get sharper. It’s the blueprint for stunning DIY beaded jewelry.